Best Practices
Tutorials
Be mindful of your blocks!
This site uses the WordPress Block Editor (also known as “Gutenberg”) for editing posts and pages, a new WYSIWYG editor that enables authors to create richly designed pages without touching code or installing a mess of plugins. Content is created by adding and manipulating “blocks” which do various things. The most basic block is the Paragraph block, which is automatically created as you type, however there are many other blocks that do many other things, and many blocks can contain other blocks inside them. For instance, to create a design with columns, you might choose the Columns block, which contains Column blocks, and you can create other blocks inside each Column.

As you might be thinking already, blocks within blocks can get tricky fast. To help with this, you can navigate the hierarchy, or “nesting”, of blocks by clicking on the “List View” icon at the top of the editor.
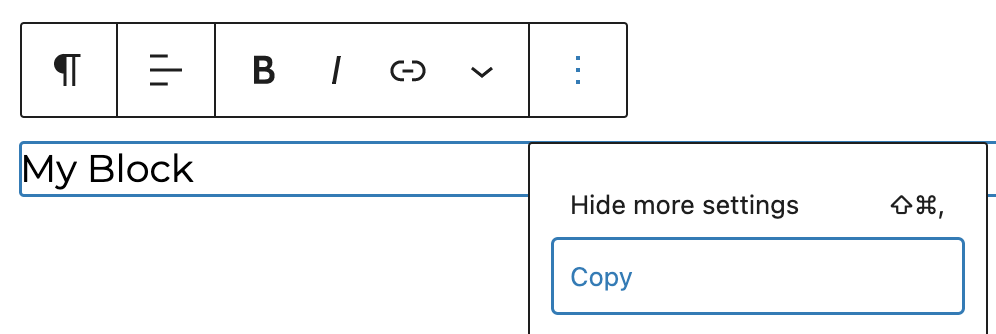
By default, WordPress shows contextual options for the selected block directly above the block itself. Check out the options under the 3 dots at the top right of the editor window. You may find you prefer the “Top Toolbar” view, which moves the toolbar for a selected block out of your way and puts it at the top of the editor.
WordPress powers over 60% of all website content management systems, so there are in-depth tutorials available from multiple sources, including on YouTube if you prefer to watch a video. Note that the Block Editor is relatively new and changing rapidly, so tutorials may show an editor that looks slightly different from the editor you have today, but the concepts should continue to be useful.
Our site includes the built-in WordPress “core” blocks, a few custom blocks unique to this website, and the Kadence Block Library which provides exhaustive customization.
Try not to use “px” units.
To promote good typography, this site comes with predefined, named font sizes (“small”, “medium”, etc.). Custom font sizes should be avoided and are disabled in core tools.
Use “em” or “rem” units wherever possible for padding, margins, and other sizes. This site is mobile-responsive, which means it tries to look its best at every screen size. Pixel (“px”) units relate to pixels of a screen and can cause issues with responsive design. The “em” and “rem” units are relative to font size, where “rem” is relative to the base site font size, and “em” is relative to the element’s container’s font size. Since our site’s base font size changes to match the screen size, using these units is preferred.
This can be tricky because most places where you can change sizes in WordPress default to “px”, so be on the look-out for that and change them to “em” or “rem.”
Headings are structure, not style.
Headings (H1, H2, H3, etc) come with default font sizes—but using a specific “level” of heading is not a style choice. Heading tags create structure within the page which helps describe content to search engines and disabled visitors.
They must appear in logical order, do not skip heading levels simply to get a different font size. Set the appropriate heading level, and change the font size using the block’s typography options in the right column sidebar of the editor. You may notice that these pages do this by using H2s for section labels with a custom font size. Unless the post title has been hidden, posts and pages always begin with the title as H1.
Do not use a bold paragraph block when its content is intended as a heading. Use a heading block set to the appropriate heading level, and set its font size to “normal” to match the paragraph text.
Images should have “alt” text.
When placing images in your content, you will often have the option of setting “alt” or “alternate” text. Unless an image is purely decorative, it’s a good idea to describe it with alt text to support accessibility and SEO. Consider the surrounding text. “Alt” text is read aloud by screen readers for the blind and visually disabled, and should make sense in context with the surrounding text. If the image contains text, the alt text should include that text.
Link text should contain context.
To aid in navigation, screen readers for the visually impaired may pluck links from the page and read them out of context. Try to use complete, contextual link text, and avoid tropes like “Click here.”
Bad: Click here for the latest reports from the Audio Active Group.
A screen reader navigating the page may only hear “Click here” and not the context for which that link relates.
Good: View the latest reports from the Audio Active Group.
Don’t be afraid of the length of link text. Not only will your links be more accessible for the visually impaired, they’ll be easier to click!
Set a Custom Excerpt.
By default, WordPress will generate an excerpt from your content all by itself, but it will not make intelligent decisions about it. Consider setting your own excerpt to your Posts, Pages, Formats, and Programs. This will help SEO and the display of the page when shared on social media.
URLs are Forever.
When creating or editing a post or page, the URL for it is automatically generated from the title. WordPress calls that portion of the URL the “slug”. You can see the slug in the editor under the “Permalink” section of the Post/Page tab of the right-hand settings bar. For example:
https://www.westwoodone.com/the-slug
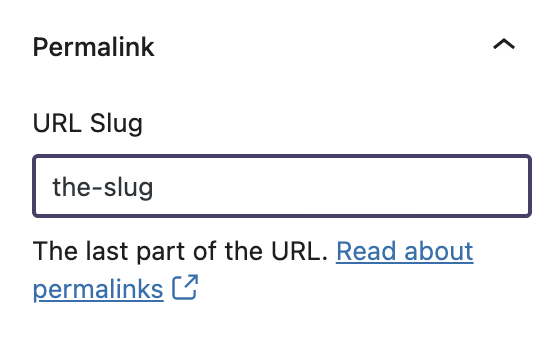
However, automatically generated slugs are not always the best choice! Sometimes the slug may already exist, in which case WordPress will add a number to the URL, which looks bad and changing it later may break links. It’s always a good idea to take care and put some thought into your URLs and slugs, because they may have to be around for a long time. WordPress does not keep track of previous slugs, and does not automatically redirect old URLs to new ones.
Reusable Blocks
The WordPress Block Editor allows you to turn blocks into Reusable Blocks, which are connected wherever they are placed in posts and pages across the site. That means if you edit a reusable block in one place, it will update everywhere that particular reusable block exists.
When creating Reusable Blocks, always give them distinctive names which explains clearly what the blocks are intended for. Using distinctive, clear names will help you find the block later and keep the reusable block library clean for everyone. To make management easier, we have included the Reusable Blocks manager directly in the admin menu for all users with access to edit Pages.
Reusable blocks should be reusable content, they are not templates. If you find yourself often converting a reusable block back into normal blocks to edit on a page-by-page basis, consider simply copying blocks instead. Select one or more blocks and copy them from the block toolbar’s other options (3 dots).